Data File
Chart
Chart view plots the data points from each sensor of the data file in data line(s).
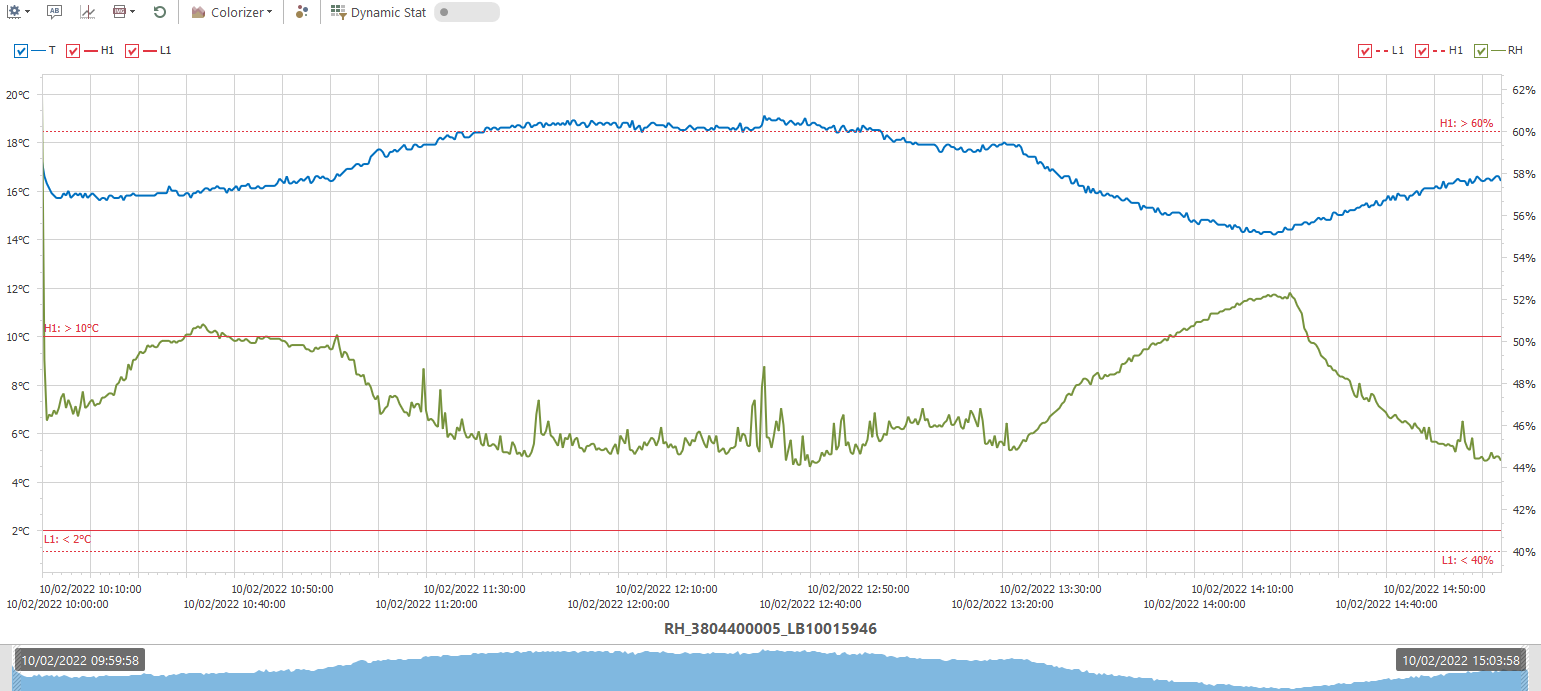
Chart Tool Bar
Chart tool bar offers a series of options and tools for user to customize the chart view
![]()
Chart Actions
| Item | Description |
| Restore chart from after chart being zoomed or time range changed | |
|
Add text annotations on chart Please note each data file could store up 10 custom annotations added on chart |
|
|
Add custom vertical line on chart firmware version Please note each data file could store up 10 custom vertical lines added on chart |
|
| Export chart as image (GIF, JPEG, PNG) | |
 |
Trend
Segment
|
|
Show key points on chart, key points include Max, Min points and alarm first triggered point (if alarms were triggered)
|
|
|
Dynamic Statistics, once turned on:
|
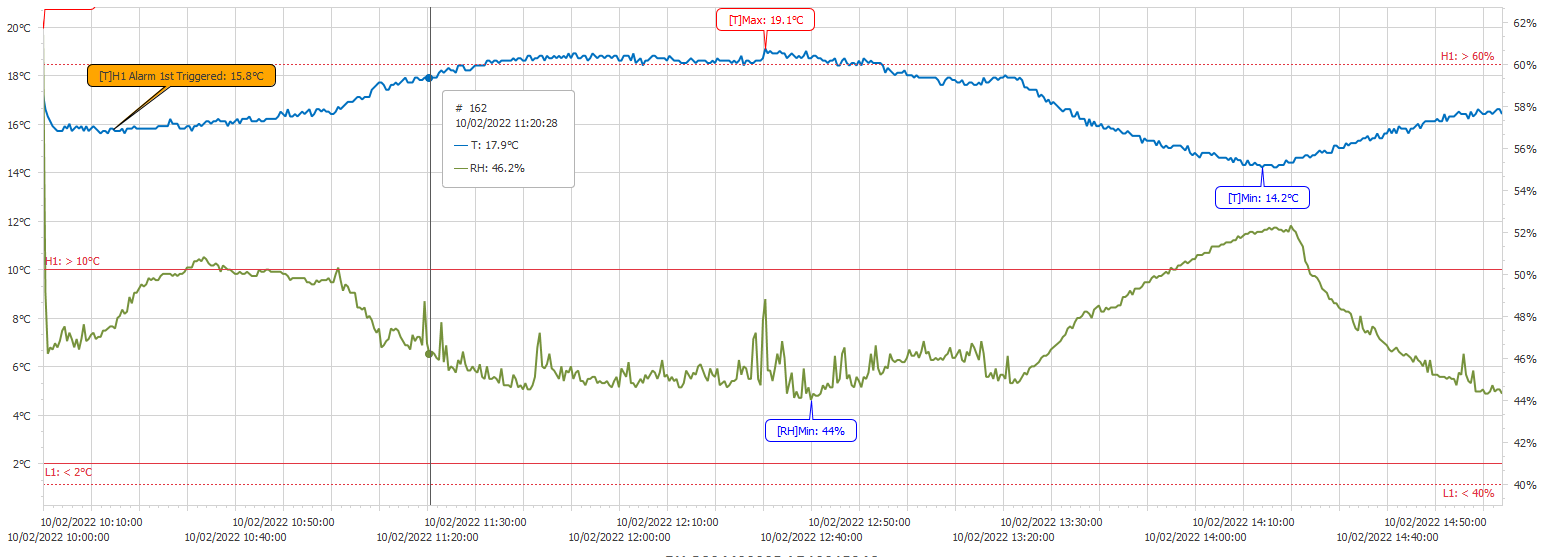
Chart Options
click ![]() on chart tool bar to open chart options menu:
on chart tool bar to open chart options menu:
- Zoom Axis X Only
- Show Custom Annotations
- Show Custom Lines
- Remove All Custom Annotations
- Remove All Custom Lines
Legend

You could check or uncheck the checkboxes in chart legend to show or hide the each data lines and alarm limit lines on chart.
Zoom In & Out
- Move mouse pointer over chart and scroll mouse wheel to zoom in the chart view with the pointer as the focus center
- Use time range selector to zoom in data within selected time range
![]()
Data Info
Data info grid locates in the top of the left pane of data file view, it presents all the basic and summarized information of the data file.
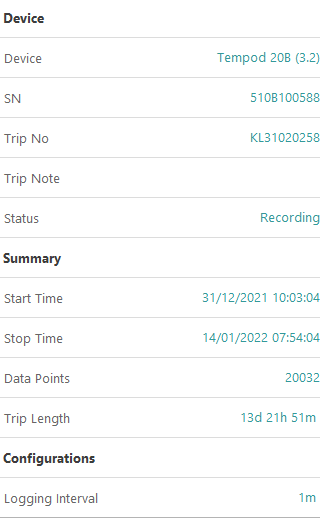 |
Learn more about all information in data info grid: |
Data Points
 |
Data points grid locates in the bottom of the left pane of data file view.
|
 Reading higher than limit H3
 Reading higher than limit H2
 Reading higher than limit H1
 Reading lower than limit L1
 Reading lower than limit L2
 Reading lower than limit L3
 Reading is the maximum value of all readings
 Reading is the minimum value of all readings
Sensors
Sensors grid shows statistics of each sensor, including the alarm statistics.

The sensor level presents the statistics of each sensor, see Sensor Statistics
Statistics of each alarm zone for each sensor will be displayed as sub detailed levels, See Sensor Alarm Statistics
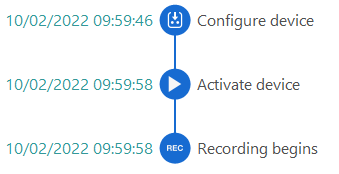
Events
Events panel lists all the device action event by the order of time
Adjust Data
click ![]() on toolbar to open Adjust Data dialog.
on toolbar to open Adjust Data dialog.
Adjusting data allows user to adjust the existing data file by redefining the time range and alarm settings, the adjusted data file will be saved as new data file in TempSen Express, so the original data file in TempSen Express will not be modified after adjustment.
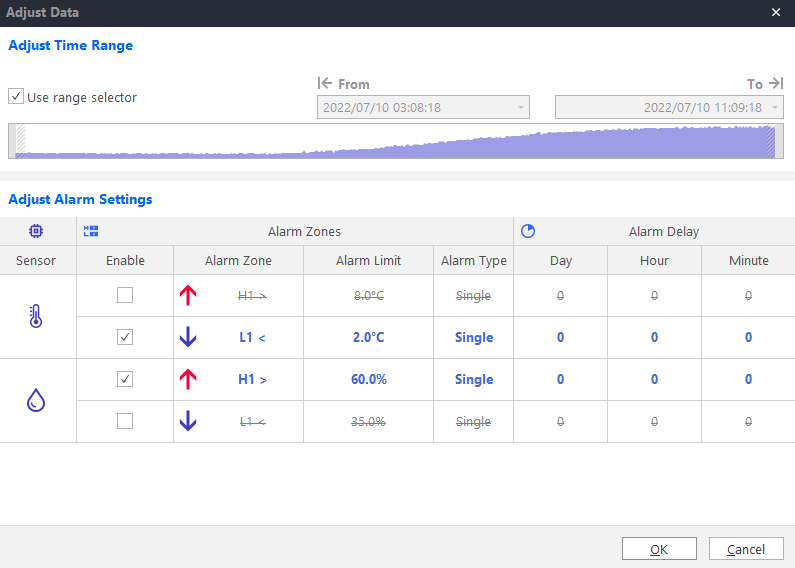
Adjust Time Range
Define new time range by drag the thumbs on range selector or just define the From and To time for the range you need
Adjust Alarm Settings
You could change the alarms settings for current data file to calculate the new alarm statistics using the new alarm settings
Digital Signatures
A digital signature is a mechanism that is used to verify that a particular digital document, message or transaction is authentic. It provides a receiver the guarantee that the message was actually generated by the sender and it was not modified by a third party. Digital signatures use a standard, accepted format, called Public Key Infrastructure (PKI), to provide the highest levels of security and universal acceptance
 |
Digital Signature requires enabling Advanced Security Mode in Settings > Security. See Advanced Security Mode |
Add Digital Signature
|
Before adding digital signature, please make sure following perquisites are met:
|
click ![]() on tool bar of Data File view to add digital signature to current data file.
on tool bar of Data File view to add digital signature to current data file.
Signer is required to provide correct login credential before adding digital signature.
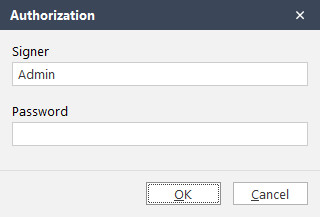
After authorization, a digital signature dialog pops out, please check the digital identity information and then select a Reason for this signature.
click "Sign Data" button to add a digital signature to current data file.

|
|
View Digital Signatures Added
Go to the Signatures tab in Data File view, you could find all the digital signatures added to current data file.

| Items | Description |
| User | User name of the signer |
| User Id | User's unique ID |
| Signer | Signer's name, will be presented as print name of the signature in exported file |
| Public Key SHA1 | SHA1 hash of the public key of the certificate used to create the digital signature |
| Sign date | Date time of digital signature added |
Delete Digital Signatures
click ![]() in the a signature row to delete the digital signature
in the a signature row to delete the digital signature
|
User could not delete signature of other users |
Export & Send Data Files
- Click
 on tool bar, then the export options menu will appear, please edit the export options you need for the file to be exported or sent
- Click "Export" at the bottom of the export menu to export current data file
- Click "Send Mail" at the bottom of the export menu to send out current data file by mail
- Progress bar shows the file exporting / sending progress, and you could always cancel the exporting by clicking


Export options
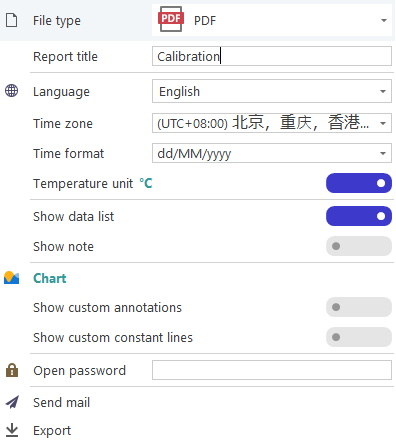
| Item | Description | ||
| File type | |||
|
PDF with signatures, a PDF file containing all digital signatures |
|||
|
Device PDF Report
|
|||
| XLSX | |||
| Report Title | Custom report title for exported file | ||
| Language | Language for exported file | ||
| Time Format |
|
||
| Time Zone | Time zone for exported file | ||
| Temperature Unit |
|
||
| Show Data List |
|
||
| Show Note | |||
| Chart Options | Show Custom Annotations | Show custom annotations on chart in exported file | |
| Show Custom Constant lines | Show custom constant lines on chart in exported file | ||
| Open Password | Password for opening exported file | ||
Send Mail
Mail Settings
You need to create valid mail settings before sending mails from TempSen Express, see Mail Settings
Send Mail
- After clicking on the
 Send Mail button in export options menu, a Send Mail dialog pops out
 - You could edit the mail subject, content and receiving email addresses in this dialog
- Mail subject, content and receiving email addresses could be created in Mail Settings as template and then loaded in Send Mail dialogue by default
- Click on Send button at the button of the dialogue to send out the mails with the exported data files as attachments
Options
click ![]() on tool bar to expand options menu
on tool bar to expand options menu
Options
Change temperature unit between
- °C
- °F
Tags
Select the tags for current data file.
|
|
Actions
Rename
Rename data file
Delete
Delete current data file